Showing posts with label recipe. Show all posts

September 25, 2012

I Dream of Gnocchi

SO, I have a food post for y'all. I didn't really take too many pictures because I was busy thinking that this was going to turn into a complete disaster or be mediocre or at least be one of THOSE dishes. Disappointing or unimpressive:
We're our own worst critics, at least until Kuzco gets involved. What can I say? Despite the odds, the dish turned out awesome. When I make more friends dans Montréal, in my magical dream scenario, I would cook this and bring it to a pot luck.

It was an experiment, after I saw a recipe for a Vegan pasta sauce that was similar to an alfredo, but made with acorn squash. What did I happen to have after my adventure in impulsively grabbing produce at our local fruiterie this week? You guessed it, acorn squash.

I'm an addict for creamy pasta sauces and I was craving comfort food after a tired Monday in classes. It's a little work intensive, not because any of the steps are TOUGH, just because there several of them to be taken in the process.
So if you make this at all (DO IT), set aside time and DON'T BE STARVING when you start. Also, don't be Vegan. Also, don't be scared. Cooking without a recipe from your brain is an art.

Now's let's make some delicious art, baby.

Riley's Experiment Turned Totally Awesome Squash Gnocchi

Ingredients
• 1/2 baked acorn squash, peeled (Slice squash in half. Gut it. Put the halves face down on a baking tray or casserole dish with a half inch of water in the bottom. Bake at 350 for 45-60 minutes, until the flesh is tender and the skin peels off easily. If you're cooking for a crowd, use the whole squash and 2 packs of gnocchi, maybe?)
• Cream cheese
• Milk
• 2 cloves garlic, minced (depending on how much you like garlic, add more or add less)
• Cooking oil of some kind
• Salt & Pepper (freshly ground if you have it)
• 1 package potato gnocchi
• basil, fresh or dry
• some type of hard Italian cheese associated with pasta on the regular. Serious, Parm, Parm Reggiano, whatever you've got on hand. 

 #1. In a bowl, mash together the squash, cream cheese and splashes of milk. Stir until it has a thick, creamy texture. (This is totally up to you, how much you add of everything. Thinner sauce? More milk. Flavour? More cream cheese.)

#2. Brown garlic in a saucepan with a splash of oil, not too much, (this is all going into the sauce) but enough so the pieces don't stick to the bottom of the pan. When it's a toasty golden colour, pour the contents of the saucepan in with the squash mixture.

#3. If you don't mind bits of garlic, you can totally throw this back on the burner now (put it all back in the saucepan from the bowl first) on low heat, stirring so it doesn't burn. I was looking for a really smooth texture so I spooned the sauce into my blender and let it rip until I felt it had been sufficiently whipped into silky goodness.  At the same time, get a pot of salted water on the boil for the gnocchi.

#4. Rip up a few fresh basil leaves and add them, plus a small amount (at most 1/3 of a cup) of my good friend Parm Reggie, grated, and stirred until it combined and melted. Salt and pepper the sauce to your taste.

#5. Cook the gnocchi in the boiling water, according to the package. (Note: When they float to the surface, they're done. GET THEM OUTTA THERE, into the nearest colander like a bad-pasta-ass action film.) 

A neat trick I like to use to thin out my sauce is to ladle pasta water into it a bit at a time. The starch from the noodles gives the sauce body, or something. I'm making that up, but it makes sense to me, OKAY?

#5. When the gnocchi are all cooked, add them into the sauce pot and stir until they're evenly coated. Then, MANGE. Slightly sweet, garlicky, creamy sauce enrobing pillowy soft gnocchi. Not bad for a shot in the dark dinner experiment! Next time, I might add more veg, like onions or wilt some baby spinach into it...

Do not even lie, you want this in your face.

September 18, 2012

A Little Less Conversation, A Little More Muffin

In case you couldn't tell (or you don't like reading-- GIRL, GO HOME) I'm back in school and the student life. The sore shoulders from backpacks, the early morning class & coffee combo, the rambling sentences about creating a general atmosphere of my current life experience. In one of my lectures (British Literature to 1660) as her introduction, the professor told us a little bit about herself. She said that when she was working on her Ph.D her escape from the mountains of pressure was sewing.

Well I might not be after a Ph.D, but this is my first time in university and I'm already apprehensive about what's expected of me. I'm no slouch when it comes to school. I slack like the Dickens, but when push comes to procrastination, I get it all done in the end. What I'm leery of is whether or not I'll be able to get a grip on all the higher thinking. University is filled with big concepts and it's built to open up your mind and teach you things to change the way you see the world. I just want to understand it. And survive. And not ruin my future. No worries, right? 

I might not be much of a seamstress, but apart from blogging and running, one of my best escapes from the pressures of life is baking and cooking. Paper panic? Cookies. Bad day? Squash Risotto. Another part of being a student is counting every penny and putting it to good use. Use meaning, when life gives you browning bananas, you make good on your money and bake muffins.

Moist, delicious, wholesome banana muffins from the recipe your mama swears by. So, last night, I threw on some tunes, my apron and brewed some coffee in my favourite mug. (Great Gays, ASSEMBLE!)

Monsieur Smith's Mix & Match Muffins
 CAST:
1 cup oats
2 cups all purpose flour
1 cup brown sugar
1 tbsp baking powder
1 tsp each cinnamon & nutmeg
1 tsp baking soda 
1/2 tsp salt 

2 eggs (room temp)
1 1/2 cups yogurt (I used greek, vanilla)
1/2 cup oil 
Dash of vanilla
1 cup fruit of your choice (MASHED BANANAS!)

1. Get two mixing bowls, one bigger than the other. The big one is for dry ingredients, the smaller one, wet ingredients. Sift all the siftables into the bigger bowl. Then added the brown sugar, oats, and salt. Mix it!

2. Combine the wet ingredients in the smaller of the two mixing bowls. Eggs, yogurt, oil, vanilla. Blee bloo blee blah.

3. Mash up! You don't have to mash the fruit if you use other kinds, but bananas work better in muffins mashed. So I got to work, like a boss. Fork. Measuring cup. Badassery.
 
When you've adequately expressed all your angst and rage and panic, add your bananas to the rest of the wet ingredients and stir.

4. This is where the magic happens. You see, when two mixing bowls love each other very very much....
They add the wet ingredients to the dry ingredients to make muffin batter. Stir just enough to incorporate the two together, no more and no less! Overmixing makes for tough muffins.

5.  Heat your oven to 350 degrees. Grease 1 1/2 muffin tins. (My mama said this batter makes 12 muffins. I want to live in her world of titanic muffin tins and humongous carbs. For the rest of us, two muffin tins are probably a good idea.)
Basically, use as many tins are you need. These babies rise, but not by much. I got 18 muffins from this recipe...
6. Bake 20-25 minutes, until a knife comes out clean.

7. Bask in your glorious, oaty children.

8. Now eat them. Bek put butter on one half of hers, and peanut butter on the other. I tried mine with pumpkin seed butter. Both were amazing.
The muffins are dense, moist, not too sweet but tasty. There's nothing quite like fresh baked goods... The best thing about baking is that it also ensures you have food ready to eat when you need a quick snack or a study break.

Uhh. I got muffin else to say here...

BYE!

October 07, 2011

Bumblebees

I've been busy lately, and more or less happy with being busy. When I'm not at work, I feel creative and I want to have fun and enjoy every second with people and with writing and everything.

Let's start off with exterior blogs & writing:

Behind the Green Apron: Part II

Fashion Friday: Your Style

Shameless self promotion! OH. And I got my hands on a copy of the Comeback Issue, the first paper issue of Travis this year. I saw my piece. I saw my picture. UN.REAL.


I never thought when I was younger I'd be in a magazine... and now.... I feel small town famous.

I got down to a little baking too!

Double glazed pumpkin scones. (Simpsons fans: Mmmm....double glazed.....) I got the recipe, and believe me. THESE WERE SO GOOD. I ate THREE the day I baked them. I brought one to work for breakfast the next morning (5AM shifts or bust?), and when I got home from work , I realized they were so good my dog Jack had eaten ALL OF THEM. That was a little sad. I'll just have to try and crank those out tomorrow before all of our guests arrive for thanksgiving dinner!


UHHHHHH. I have to go to bed now. I open 5:30AM tomorrow. Thanks, Starbucks, you douche.

August 14, 2011

Peach Almond Semifreddo

Dessert isn't something you usually get to indulge in when you're on a "DIET" or as the-diet-is-a-naughty-word people like to say, a "lifestyle change." There are alternatives, like dried fruit, and tea, strawberries, that sort of thing.... But those don't hit the spot. Sometimes you want the slab of chocolate cake, that bowl of ice cream... Well this semifreddo recipe might be the next best thing, while I'm still trying to squeeze into a smaller pair of pants.

Traditionally a semifreddo (Italian meaning half-cold) is a dessert with a frozen mousse-like texture, made with ice cream and whipped cream. DOESN'T sound very healthy, does it? Thankfully, I found a recipe in the July 2011 edition of Clean Eating magazine. It's tasty, low cal, and about as good for you as you can get with dessert.

I made this for my parent's anniversary dessert (along with a stellar Roasted Garlic Barley Risotto, ohmygod) because we're all trying to eat a little healthier these days. It's hella easy. HELLA, I SAY.
Peach Almond Semifreddo (Clean Eating Magazine, July 2011)

Ingredients:
1 cup nonfat plain Greek yogurt
1 egg, separated
1/3 cup evaporated cane juice (I didn't have this, so I just used the same amount of agave nectar. If you don't know what any of this stuff is....uhh.. Go ask your local hippie/yuppie grocery store!)
1/2 tsp pure almond extract
1 tsp pure vanilla extract (I used a vanilla bean as well, because I had one around the kitchen!)
3 egg whites
2 medium peaches, pitted and diced
1/3 cup unsalted almonds, toasted

Prep:
Line a 8x4x5 loaf pan with plastic wrap. No worries about nonstick sprays or nothin'!

I toasted my almonds over medium heat in a frying pan on the stove for about ten minutes, until they smelled good! Then, I covered them in a tea towel and smashed them with a big kitchen hammer. MORE FUN!
Then I separated the eggs, taking care to make sure no yolks got in with the whites, and cut up the peaches. Easy peasy!

Instructions:
Combine yogurt, the egg yolk, the cane juice and the extracts. As I mentioned I used a vanilla bean in addition to this... and I have to admit the flavour was a little strong. I'd put in half next time.
In a separate bowl, beat the egg whites into stiff peaks. (I find that they whip better with a pinch of cream of tartar, and also at room temperature!)
Fold the whites into the yogurt mixture, 1/3 at a time. Then gently fold in the peaches and almonds.
Pour mixture into the loaf pan and smooth the top. Freeze for 2 or 3 hours, until just frozen.
When it's finishing, invert it on a serving tray, peeling away the wrap and slice with a knife that has been warmed by hot water! (Warning: REALLY try to eat it after 2 or 3 hours. Through a series of unfortunate events, I had to wait 24 hours and it was frozen solid and by then... So then it had to thaw. It was a little icy, but it still tasted awesome. When done properly, I bet it's the shizzle.)

Looks like ice cream?

March 27, 2011

Part-time Pierogies

In Apartment 605, we're edging on foodie-ism. Last Saturday, we made lamb sliders with homemade tzatziki sauce. This week, hunting through our fridge, Allie had a stroke of genius, in the form of pondering about making pierogies. I bet you can't guess what we had for dinner.
This is something we've done before, but the last time we did it, I remember it was labour intensive and time consuming. I was watching Apocalypse Now! (the crappy Redux version...) for a class studying film sound and I stopped it half way through to put them together. Well HOURS later, with the girls jumping in to help, I finally got back to the movie I could not focus on anymore. They were yummy, sure... But the recipe we had used before required you to roll the dough out. With neither rolling pin or proper surface, it was torture, and that was only to prep them for boiling AND pan frying.

The kitchen was a mess, we were exhausted, but at least we were full of something tasty.

While I know that great food takes time, I couldn't go back to that. I also couldn't drop the idea, the Russian/Polish roots from my mama's side just would not let me. I decided to look for a different recipe, and found the one at Soupbelly.
It looked promising. Instead of rolling out the dough and cutting it, you divide it up into spheres and flatten those out, then fill them.


Potato-y, cheese-y goodness. Simple, yes. Delicious, definitely!
You can find the recipe here.

Note: The topping is just chopped bacon and onions fried in a pan together. Also, there was sour cream left over from the s'more cheesecake square I made last week too. Yeah, we know what we're doin'.

March 14, 2011

Easy as Pi

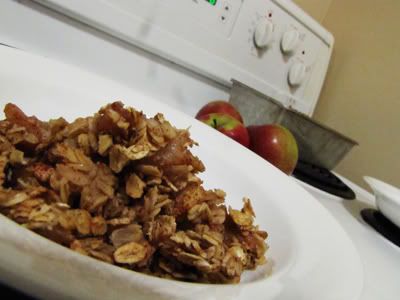
Happy Pi Day, y'all! I thought I might post a little something tasty to celebrate the occasion. It's not pie, which might be a faux pas, but I didn't have the ingredients for crust. I did however have some mac apples that were about to go off the deep end, and oats. You know what they say: when life gives you apples and oats, make apple crumble! (I'm sure they say that somewhere.)

This recipe isn't perfect. I was cooking with limited ingredients so the prototype is a little sketchy. Also, I've gotten to a comfort level in my kitchen abilities where I've stopped measuring and writing things down, or even reading off of recipes! All my measurements are therefore approximate. Kitchen intuition, friends. Dig it.

To those of you who are scared of branching out and trying things: don't be. Kitchen mistakes (if there are any!) can turn out to be the tastiest mistakes of them all!

Easy as Pi Day Apple Crumble
Serves 2-4 depending on your crumble addiction...Preheat your oven to 375 degrees. Still with me? Carry on.
In one bowl:
1 1/2 cups quick cooking oats
1 tbsp flour
3 tbsp brown sugar
3 tbsp butter, melted

Combine all of these together, stirring so the oats are coated. Set aside. Easy, you got this!

In a second bowl:
4 of your favourite apples, peeled, cored and sliced. (I used Macintosh!)
Sprinkle of cinnamon
Sprinkle of sugar (optional)

Toss the apple slices in sugar. Spray a loaf pan with nonstick cooking spray. Layer the apples in the bottom, then cover with the oat mixture. Bake for 25 minutes, until the oats have a nice brown colour and the house smells ridiculously good.

Serve with yogurt, vanilla ice cream, or whatever your heart desires!

March 07, 2011

To Brussels, with haste!

Today I had a case of the Mondays. I almost hit a car leaving the parking garage this morning; then my headphones broke on the platform while I was waiting for the train. I got to work to find the WiFi broken. The Ethernet connection was not working either. The script I had to read was bad. So on and so forth.
So when I got home, I knew at least what was going to lift my spirits: making something awesome for dinner. One of my new favourite things…. Are you ready for it? Brussel sprouts!

2011 is turning into the year of trying things I thought I hated and realizing I actually have been missing out. For example, wearing casual dresses. All the seafood I sampled in California. White wine…annnnnnnnd brussel sprouts! I know everyone hated and dreaded them as children, but friends, they are AWESOME.

It started when I was grocery shopping, and saw that they were on sale… It was something ridiculous like 99 cents for a pound. Could I resist such a deal? No, I could not. Despite my kiddie hang ups about the itty bitty cabbage doppelgangers, I remembered I had seen a recipe for ROASTED brussel sprouts and decided to put it to the test. To make a long love affair short:

LIFE. CHANGING. They’re salty, crunchy on the outside, colourful and fairly healthy. (Fact: they contain cancer fighting compounds!) It’s as tasty as you’ll ever find ‘em without cooking them up with bacon fat, another traditional method. So without further pomp and circumstance, I present to you, a revelation:
Roasted Brussel Sprouts
(serves 1…but it’s really easy to double, triple should you feel the need….cough.)

6 or 7 brussel sprouts of a similar size
olive oil
kosher salt (or table salt or rock salt. Find some salt, okay?)
pepper (optional)

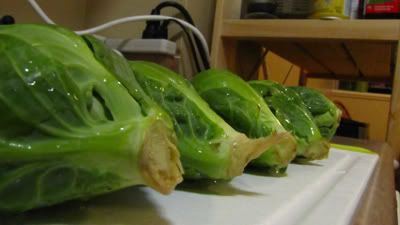
First thing’s first. Preheat your oven to 375 degrees. Pop dem sprouts into a colander and rinse them off. When they’re dry, trim off the ends.The best part of these beauties is the roasted delicious toasty brown flavour. How do we get as much as possible? Split your sprouts in half! More surface area = more yum. I find it’s easiest to cut them on the vein, follow the line with your knife.

Toss the halves in a bowl. Drizzle with approximately 1 tbsp of olive oil and sprinkle with salt and pepper. However much you want. I usually find a generous pinch does it. Toss to coat evenly. I had a picture of this step but it was icky.

Lay out on a baking pan, preferably lined with parchment paper.


Bake for ten minutes on one side. Take them out and flip sides to increase browning action. Bake for another 5-10 minutes.

Remove from oven, plate with other food, or just dive in. Devour the goodness.

February 19, 2011

Betta' with Chedda'

Recently, I've been medically unfortunate. Three weeks ago, I had a cold sore on my lip...That was a new and enchanting experience. Last week, I had an eye infection that made my left eye red, swollen and painful. This week, I wore some shoes that made my heel blister....then the blister broke. Now it's infected and seeping. Friends, there are some things feet shouldn't do. One is to be uncomfortable in Ugg style boots. The other is seep. My left foot happens to be doing both right now. I don't walk in shoes, I hobble like a lovable Hunchback.

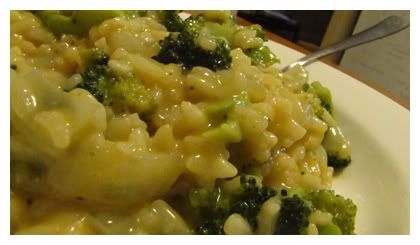
So today, after I got back from a shoot for the documentary I'm co-producing, Fire Academy, after I took off my boot and looked at the ugliest blister I've ever seen on my foot, after a nap, I finally got down to business and made myself an awesome dinner. Broccoli and cheddar risotto.
I'm gonna show you how to make it, because risotto is wonderful, delicious and versatile. I know what you're thinking, if you've never made risotto before. You're thinking it's complex, scary, time consuming. I'm here to tell you, risotto is like a college party.
The first time you go to a college party you're nervous, and the first time I made risotto, I was worried too. If I learned anything from watching Gordon Ramsay go ballistic on Hell's Kitchen, it was that this stuff is precise science and it was direly easy to mess up.
The funny part is, this isn't true at all. Now I make risotto on the fly, with random ingredients. This particular one is like your childhood best friend, broccoli and cheddar rice all grown up.

Meet our cast of characters:
2 tbsp olive oil
1 cup white wine
1/4 of a large onion, chopped
1 cup cheddar cheese (grated)
Broccoli, as much as you want (chopped)
2 chicken bouillon cubes + 4 cups hot water (or 4 cups of a stock of your choice!)
1 cup arborio rice

A party usually starts off with a few good friends. Onions and olive oil have been tight for a long time. Let them hang out in the pan, stirring over medium heat. Cook them until they're translucent like this:
At the same time, elsewhere, people are getting ready for the party, pre-drinking, dressing up, the works. So heat up your bouillon or your broth in a separate sauce pan, keeping the heat on medium low.

Add the rice into the onions. Rice is the shy freshmen at the party who need a bit of heat to let loose. Stir them around to coat them with oil for about a minute. Then add a cup of white wine, room temperature. (Or microwave it a little if you're like me and you forgot to take it out ahead of time.) The addition of the alcohol not only adds flavour, but it REALLY makes it like a party.
I don't use the expensive stuff...anything under 10$ will do.

At this point, more people have arrived. They're starting to mix and mingle together. Add the broth, one cup at a time. Stir it up until it is absorbed into the rice, adding until you're on your last cup.
Note: Stirring IS necessary for a risotto, but you don't have to spend 30 minutes straight doing it! I prepped the broccoli and cheddar, AND did dishes while I was minding this baby!

Now it's time for the the wild cards. Ladies and gentlemen, I'd like to introduce you to the party crashers. The people who show up at the party and make it a PARTY. The flavour. The BOOM!

Add the broccoli first, with the last cup of broth. It will need longer to cook, so give it a fighting chance to make itself at home with the other guests.

After this, add the cheese, stir in to melt. This is point in the party sometimes called kiss o'clock where everyone's hooking up. You can serve it immediately, but I like to let it cool and thicken a little. It's part exercise, part self control.
You know what I enjoyed with my awesome risotto dinner? Lavender Soda Pop. Damn straight.

February 12, 2011

(Red) Velvet Goldmine

I'm very VERY pumped for my first post here! If you're reading this, it means YOU ROCK! I don't want to gush, so instead of crying like an Oscar winner, I'm going to get on with the show!

My roommates and I are fairly health conscious. We eat our veggies, we choose lean ground beef when it comes to burgers, and we only indulge in REAL dessert every now and again.

A few weeks ago my roommate Rebekah turned 21, she knew exactly what special treat she wanted to celebrate with... A two tiered red velvet cake, smothered in cream cheese icing and topped with toasted coconut. As the resident baker, the idea of the insanely decadent cake made me giddy.

I settled on the recipe but soon found red velvet has a will of it's own. When I ran out of a key ingredient (OIL!) I had to substitute. My hands got stained with the food colouring. In the midst of the cake batter battlefield (say that 10x fast!), I burned my thumb on the corner of the pan. You know what? It was totally worth it.


Red Velvet Cake avec Cream Cheese Frosting
(Adapted from A Farmgirl's Dabbles)


Cake:
2 1/2 cups cake flour, plus more for pan dusting
1 tsp. salt
1/4 cup cocoa powder

1 1/2 cups sugar
1 1/2 cups melted butter (in microwave or on the stove top)
2 eggs (room temperature, if you can)
4 tbsp. red food coloring
1 tsp. vanilla extract
1 cup buttermilk

1 1/2 tsp. baking soda
2 tsp white vinegar

Frosting:
16 oz. (two bricks) light cream cheese, at room temperature
1 c. butter, at room temperature
4 c. powdered sugar
1 tsp. vanilla

•Preheat oven to 350°. Butter two 9″ x 2″ round cake pans. Dust with flour, tap away extra, set aside.
•In a medium bowl, whisk together cake flour, salt, and cocoa.

•In a separate larger bowl beat sugar and melted butter on medium speed until well combined. Add eggs, one at a time, beating until incorporated after each addition. •Add food colouring and vanilla then beat until combined. Add the flour mixture, alternating with buttermilk, scraping the sides of the bowl with a rubber spatula as needed.

•In a small bowl, whisk together baking soda and vinegar. Enjoy the chemical reaction, and remember the one time you saw it at a science fair as a kid. Then add it to the batter, and beat for 10 seconds.

•Divide the batter between the two prepped cake pans. Bake until a cake tester inserted in the center of each cake comes out clean, 30 to 35 minutes.
•Transfer to a wire rack to cool in the pans for 5 minutes. Remove from the pans, and return to the rack, top side up, to cool completely.

Frosting:
•Cream together cream cheese and butter on medium high until combined. Beat in the powdered sugar 1 cup at a time until fluffy. Add in the vanilla. Sample for quality control, MMM.

•Spread 1 1/2 cups of frosting on top of one of the cake layers. Place second layer on top and smother. SMOTHER WITH ABANDON.

• DEVOUR! Or you can store the cake, covered in the fridge...

We ended up having it for dessert every night for an entire week, so it keeps very well. Take it out about 10-15 minutes prior to serving to take the chill off. Yummmm!